Jill Tiongco Photography products | professional prints, canvases, frames, and more.
April 18, 2013
I am so excited to introduce my new line of prints, canvases, and even gallery frames! All 2013+ clients will now be able to view their photo shoot in a private gallery where they can view, download (if you purchase the digital downloads), canvas print, and even choose a custom frame to display their photographic art. In the past, I simply would sell the USB Drive to the client, and they then could print wherever they chose. But don’t worry, you can still do that 🙂
However, it came to my attention that clients were often taking the USB drive to Walgreens, Target, Staples, etc. While these places produce a decent quality photograph; the clarity, color, and resolution of the photographs were not being showcased to their full potential. And it made no sense to me as to why I wasn’t offering my clients (who pay a lot of money to get professional photos taken) an option to print these photos at the HIGHEST QUALITY POSSIBLE – otherwise, why bother getting professional photos taken at all?
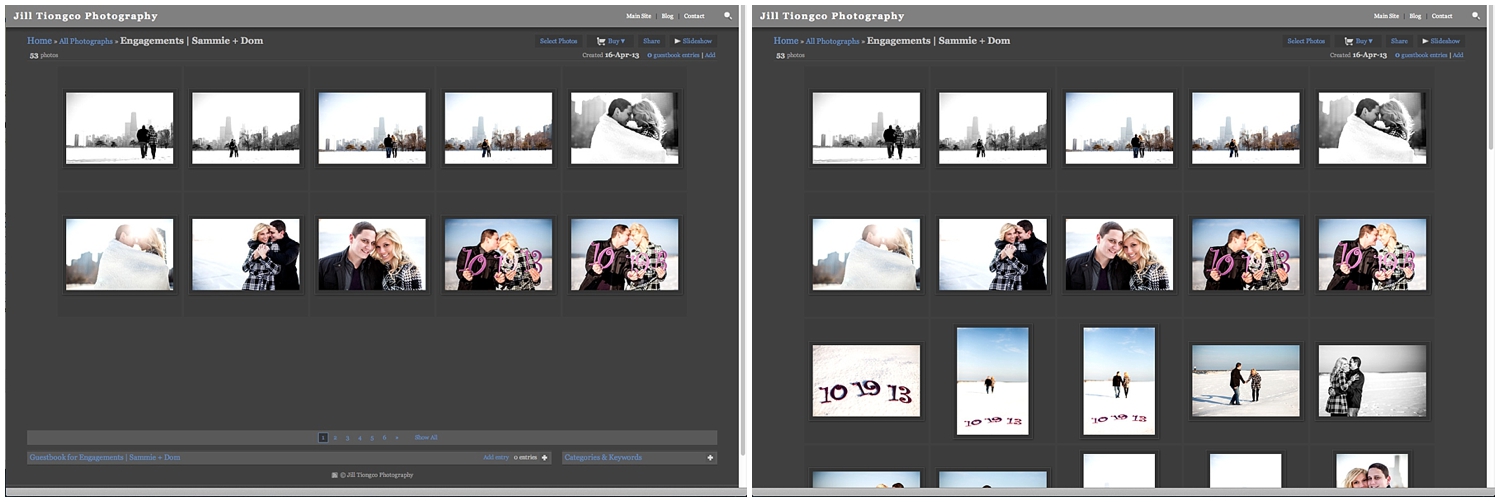
The whole process is simple. Once I’ve uploaded the photos onto the gallery, I’ll send you a link. When you click on the link it will take you to a gallery that will look like this (obviously with your pictures on it!) Click “Show All” at the bottom of the page and it will expand the gallery:
Once you look through the photos and finally decide on one (or two, or three, or twenty…), you can click on it to enlarge. You’ll also see smaller thumbnails of the rest of the gallery on the right side of the page. When you have the picture you want to print highlighted/enlarged, click the “Buy” tab on top of the large photograph so you can choose which product you’d like.
When you click, “Choose Product” you will be prompted to either “Prints” or “Showcase” (which includes the popular canvas prints, metal prints, and much more. For the purpose of this blog (and so I can show you my favorite product), I chose prints. It will then take you to a screen with all the different sizes… anything from wallet size to 30″ x 40″. I chose 16″ x 24″.
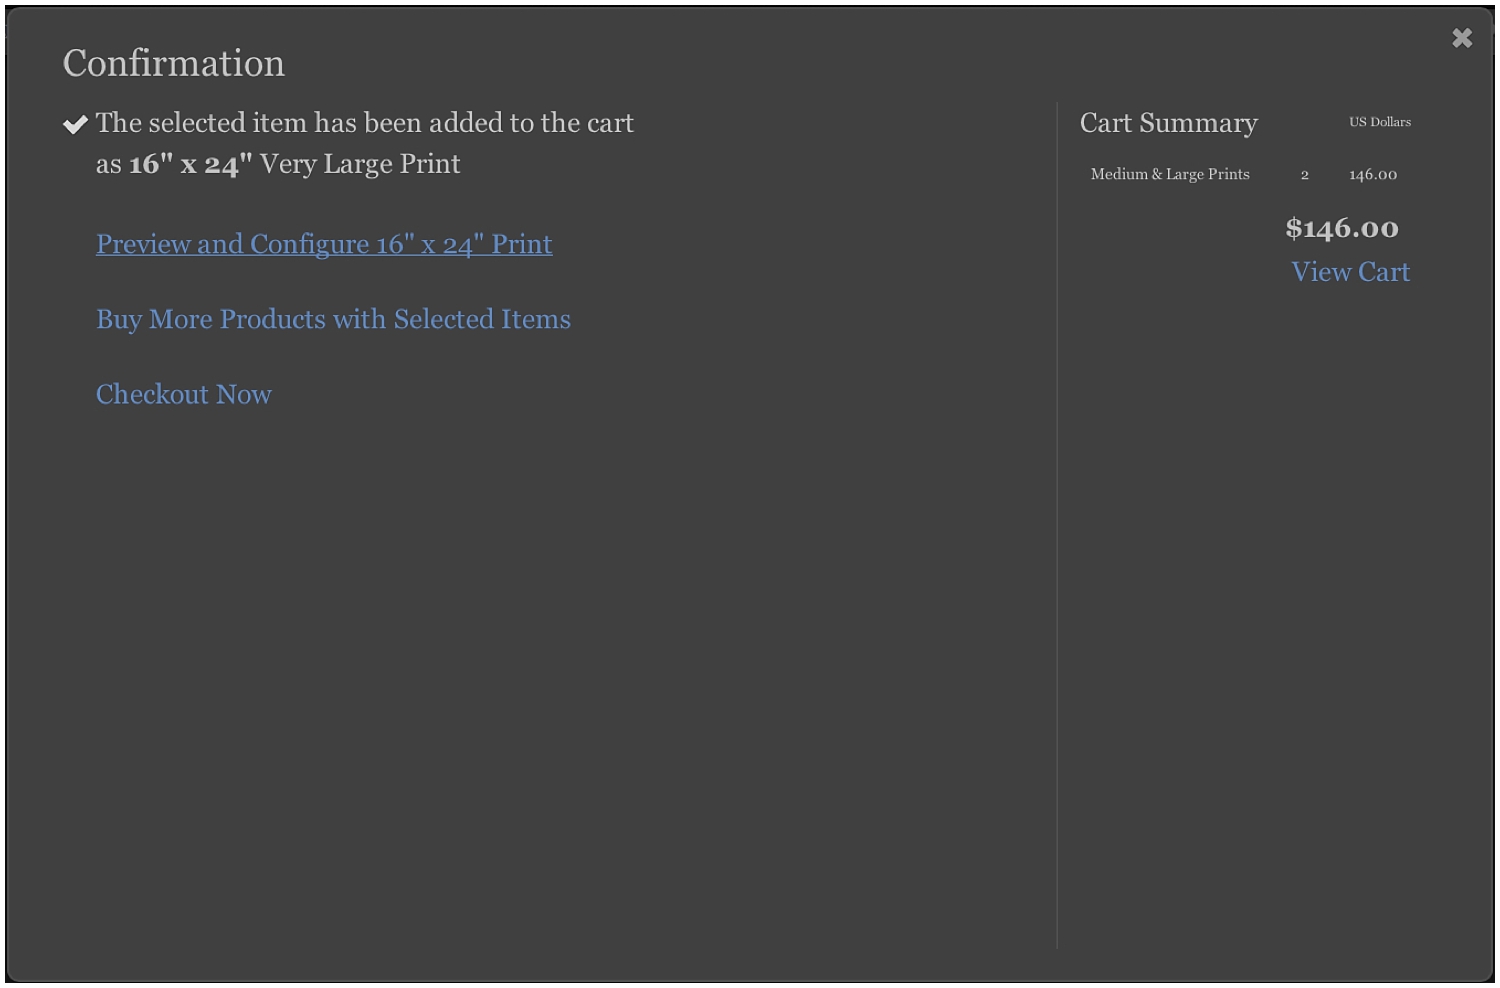
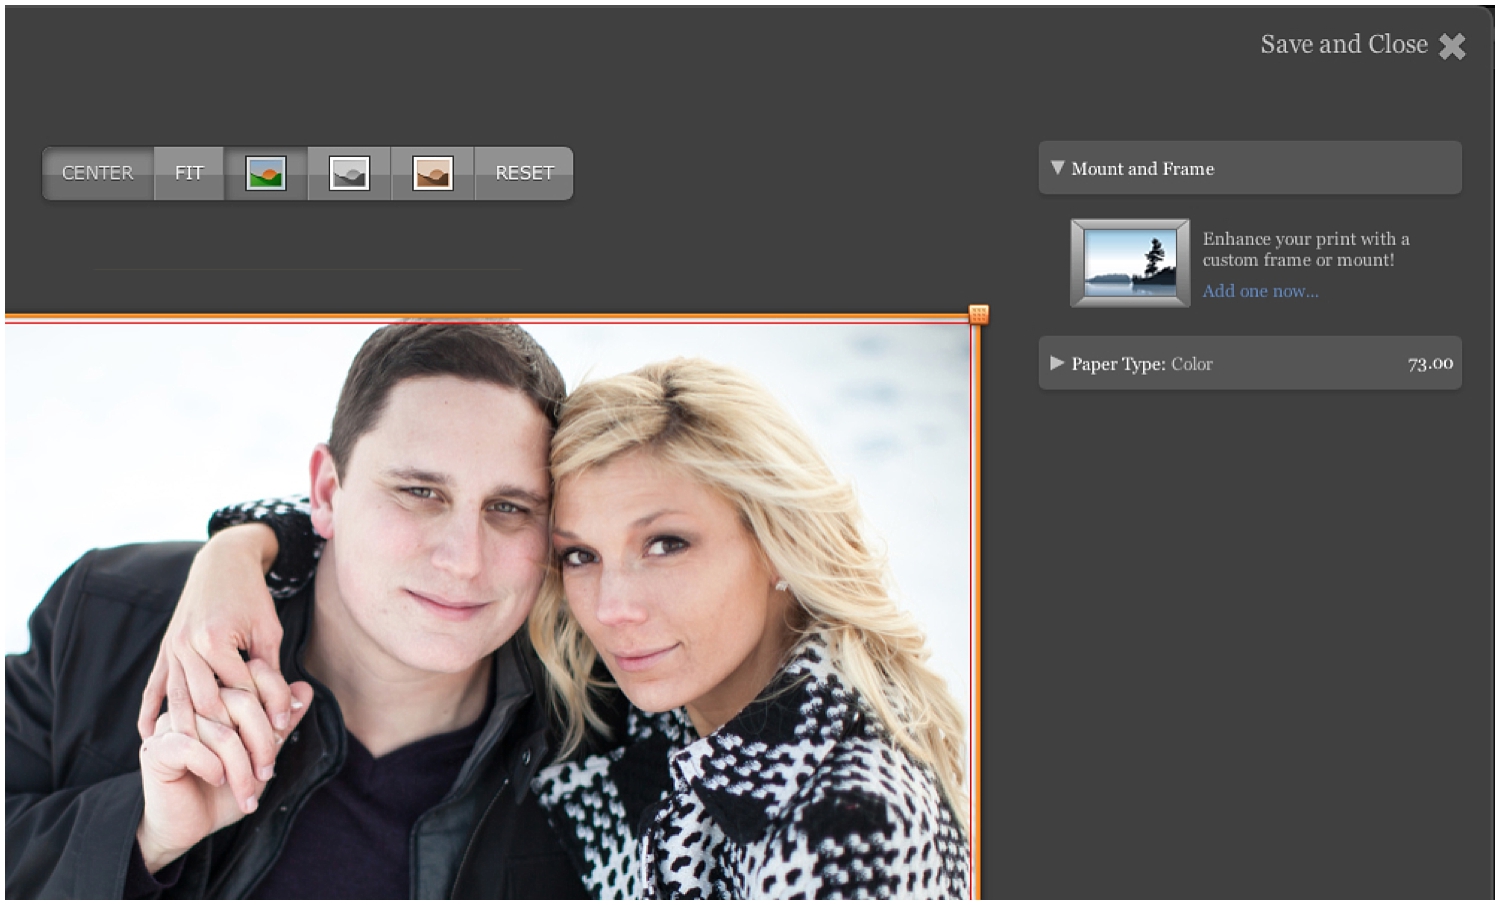
After choosing the size, it will take you to the screen shown below on the left… from here you can either check out, choose other products/prints to buy, or preview and configure the print – which is what I would recommend doing for all prints, just to make sure the crop is right – ANDDDD this is the step where you can choose a frame (my favorite!).
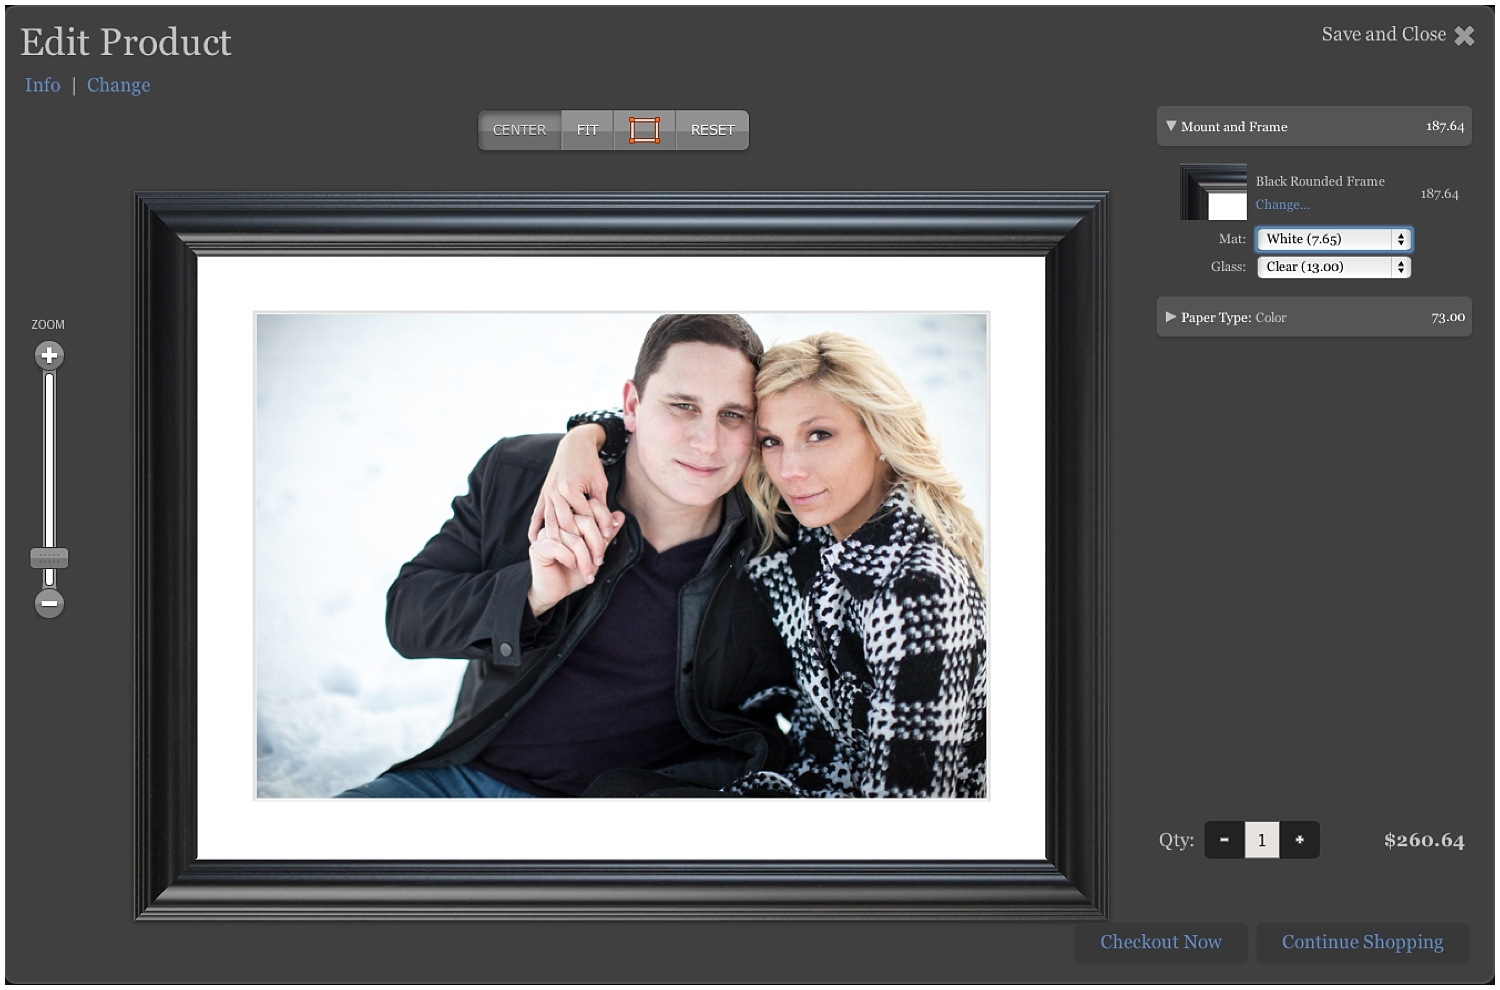
As you can see your photo will show, with the orange lines showing the crop mark (these will vary with the size print you chose). Above the photo you can choose to center the photo in the crop line (you can also drag the photo to be cropped where you want it), choose to fit it to the crop lines, then choose color, black and white, or sepia. Did something you don’t like? That’s ok, you can always hit Reset. On the righthand side of the screen you’ll see Mount and Frame. THIS is where you choose the style of frame you want. Choose from Silver Metallic, Beaded Black, Mahogany… there’s so many choices it’s easy to find one that matches your home!
After you choose the frame, you can also add a mat (which I just adore). Best part is… there’s a preview of all of the choices on the left so you can see what your photograph will look like framed before you even buy it.

Easy isn’t it? And that’s just ONE of the many new products being offered. It’s all easy to navigate, but if you have questions on how to purchase any other products feel free to shoot an email to photos@www.jilltiongco.com.
Shout out to my photog bud, Ryan Moore Photography for helping me out with this one 🙂


Leave a comment